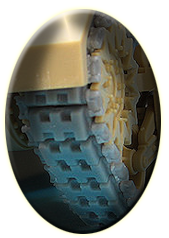
Track assembly tips


The Panda tracks are considered to be amongst the easiest track sets to assemble. A brief set of instructions is included on the inside of every set label. Some modelers have asked for some additional suggestions for assembling the track sets. The techniques we recommend were not developed by us, but have been adopted from the writings and suggestions of many of the hobby’s most prominent modelers including Cookie Sewell, Steve Zaloga, Shep Payne, and many others.
Step 1
Cut off all the links and connectors from the sprues as cleanly as possible. I like to use a sprue cutter to cut in close to the part and then clean up any remaining burrs with an inexpensive nail file borrowed from my wife. I place all the track pads in one Dixie cup and the connectors in another.
Step 2
Create an assembly jig to make sure the track runs are straight. This can be as simple as a length of ¼ inch masking tape stuck to the table with the sticky side up and placing the track shoes at regular intervals along the masking tape. A more elaborate jig can be developed using a thick styrene strip (.125"x .250") from your favorite vendor (Evergreen, etc) or even a straight edge ruler. Modelers using this type of jig place the shoes against the strip and assemble the connectors, letting them rest on top of the strip. In this way they get a straight alignment of the track and the proper orientation of the connectors in one step. An even more elaborate jig was created by Steve Zaloga. In his excellent Osprey Modeling book called, “Modelling the US Army (75mm) Sherman Medium Tank” he uses two lengths of Evergreen hollow rectangular stock slightly narrower than the width of the track shoe that are glued together at one end with a gap between them just wide enough to slip in the Sherman track shoes. A floor made of a scrap piece of flat styrene is glued to the two lengths of stock so that the final result looks like a plastic trench. A second set of two rectangular stock is assembled into a jig with just a gap the thickness of the track shoes. When the first run of connectors has been cemented and dry, the run is transferred to this second jig. The glued connectors hold the track from slipping out and the other connectors are added and glued.
I use a variation of the Zaloga method in that I use two lengths of hollow rectangular stock that are slightly narrower than the track shoes so that the track shoe pins on each side stick out. I fasten the two pieces with the shoes trapped between using a rubber band at each end. Whichever method you use, place the individual track shoes in your jig making sure that all the chevrons (if applicable) are running in the same direction. I recommend no more than 10 shoes at a time.
Step 3
Take the first connector and attach it to the first two shoes. Continue adding connectors until the one side of the track run is complete. At this point we need to discuss the different builder preferences and their correspondingly different assembly methods:
Option One
Many builders like to glue the connectors on permanently during assembly. In this case, glue all the connectors with liquid cement (personal preference, but I prefer Testors), let it set up, add the connectors to the other side, and glue them up. Let the assembly dry. Runs going around the sprockets or the idler should be fitted when the glue has partially set up, but not completely dry. Some modelers connect all the runs and mount the track on the model while the cement is still soft, while others make the last connection and mount when the completed sections are dry.
Option Two
A few builders leave gluing for last after they have fitted the runs to the tank. The Panda connectors fit snugly so that one can fit a run to the tank without fear of it coming apart. The runs are fitted to the tank and assembled together. At this point each connector is painted with liquid glue and left to dry.
Option Three
Many builders like to create a workable track. We learned this technique from the writings of Cookie Sewell and modified it slightly to meet our own needs. When making a workable track, add another connector to the shoe at the end of each run, and paint every other pin on the first side with liquid cement and let dry for 15 minutes. I then turn my jig over, add the connectors as before, and paint the same pin on each link with cement. Let assembly dry. The result is a "trapped" link with one side of each shoe fixed but the other end movable. This technique has the benefit of making track installation easier after the model is finished.
Step 4
No matter what method you use, it important to fit the runs to the model to ensure that the track links fit inside the driver guide teeth properly to avoid problems in final assembly. In addition, you want to make sure the tracks are wrapping tightly around the idler and that the track runs are straight.
Back to top